Presto Installation : A Step by Step Guide to Run SQL Queries
Install and run PrestoDB (0.296+) on your local machine in under 10 minutes. Follow this hands-on tutorial to deploy a high-performance SQL query engine for your Data Lakehouse architecture.
Prerequisites
Before getting started, ensure that the following are installed:
- Operating System: macOS (Intel or Apple Silicon), Linux, or Windows.
- Java Development Kit (JDK): Java 17 is now required for newer Presto versions. (Java 8 is no longer sufficient). (Run
java -versionto confirm). - Python: Version 2.7 or 3.x (Presto’s launcher uses Python). (Run
python3 --versionto confirm). - RAM: Minimum 4GB available (8GB+ recommended).
Download and Extract
Run these commands in your terminal to download the latest server package.
- Open terminal/command line interface and run below command’s.
# 1. Download the tarball
wget https://repo1.maven.org/maven2/com/facebook/presto/presto-server/0.296/presto-server-0.296.tar.gz

# 2. Extract it
tar -xvzf presto-server-0.296.tar.gz

# 3. Move it to your Desktop or your preferred directory
mv presto-server-0.296 ~/Desktop/presto-server
cd ~/Desktop/presto-server- Verify that the resulting directory structure matches the example below:

Configure the Server
- Inside
presto-server–*, create theetcconfiguration directory.
mkdir etc- Create the following four files inside the
etcdirectory:config.properties,jvm.config,log.properties, andnode.properties.

- Apply the following configurations to the
node.propertiesfile. (This identifies your machine).
node.environment=production
node.id=ffffffff-ffff-ffff-ffff-ffffffffffff
node.data-dir=/path-to-your-presto-server/data -----> Set this path to your presto server directory location- Apply the following configurations to the
jvm.configfile. (This tunes the Java engine. Use this exact config to support Java 17).
-server
-Xmx2G
-XX:+UseG1GC
-XX:G1HeapRegionSize=32M
-XX:+UseGCOverheadLimit
-XX:+ExplicitGCInvokesConcurrent
-XX:+HeapDumpOnOutOfMemoryError
-XX:OnOutOfMemoryError=kill -9 %p
--add-opens=java.base/java.io=ALL-UNNAMED
--add-opens=java.base/java.lang=ALL-UNNAMED
--add-opens=java.base/java.lang.reflect=ALL-UNNAMED
--add-opens=java.base/java.lang.invoke=ALL-UNNAMED
--add-opens=java.base/java.util=ALL-UNNAMED
--add-opens=java.base/java.util.concurrent=ALL-UNNAMED
--add-opens=java.base/java.util.concurrent.atomic=ALL-UNNAMED
--add-opens=java.base/java.nio=ALL-UNNAMED
--add-opens=java.base/sun.nio.ch=ALL-UNNAMED
-Djdk.attach.allowAttachSelf=true- Apply the following configurations to the
config.propertiesfile. (This sets up your node as both a Coordinator and a Worker).
coordinator=true
node-scheduler.include-coordinator=true
http-server.http.port=8080
query.max-memory=1.5GB
query.max-memory-per-node=1GB
query.max-total-memory-per-node=1.2GB
discovery-server.enabled=true
discovery.uri=http://localhost:8080
query.max-memory(1.5GB) must be smaller than theJVM Heap(2GB).
- Apply the following configurations to the
log.propertiesfile. (This sets your default logging level).
com.facebook.presto=INFOAdd Data Connectors
- Create the
catalogfolder insideetcdirectory.:
mkdir etc/catalog- Create a file named
etc/catalog/tpch.propertiesand apply below configuration:
connector.name=tpchStart the Server
- Navigate to the
presto-server-*directory and run command:
bin/launcher start- Wait 10 seconds, then check the status:
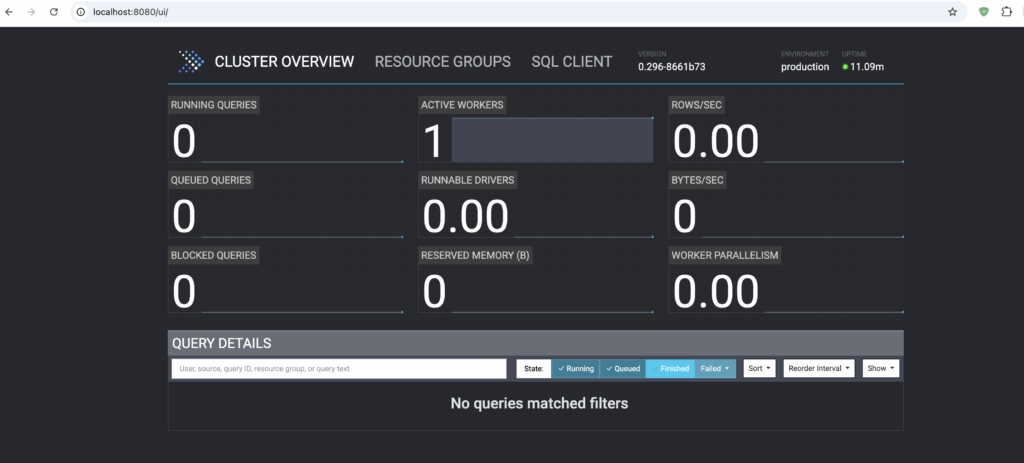
bin/launcher status- Access the Presto UI at
http://localhost:8080via your web browser.
Run Your First Query through Presto CLI
- Download the CLI from here and move the jar file to
presto-server-*directory with below command:
mv ~/Downloads/presto-cli-0.296-executable.jar ./presto- Make it executable:
chmod +x presto- Connect to your local cluster:
./presto --server localhost:8080 --catalog tpch --schema tinyOnce you see the presto:tiny> prompt, you can type your SQL:
SHOW TABLES;- Run a standard TPC-H aggregation query
SELECT returnflag, linestatus, sum(quantity) as sum_qty, count(*) as count_order
FROM lineitem
GROUP BY returnflag, linestatus;- To stop the server cleanly:
bin/launcher stopTroubleshooting Common Issues
If the server fails to launch, investigate these three common configuration pitfalls:
- Port 8080 already in use
The Error:
java.net.BindException: Address already in useThe Fix: Another app (often another web server or Jenkins) is using port 8080.
- Option A: Kill the process using it:
lsof -i :8080thenkill -9 <PID>.- Option B: Change Presto’s port in
etc/config.propertiesto8081.
- Java version not supported
The Error:
Presto requires Java 17+ (found 1.8.0_xxx)The Fix: You are running an old Java version.
- Run
java -versionto check.- If you have valid Java 17 installed but it’s not default, point to it explicitly in your startup command:
JAVA_HOME=/path/to/java17 bin/launcher start
- Server Starts but Dies Immediately
The Error: Launcher says “Started” but
statussays “Not running”. The Fix: This is usually a configuration typo or memory issue.
- Check the detailed logs:
cat data/var/log/server.log- Ensure
query.max-memoryinconfig.propertiesis less than-Xmxinjvm.config.